Table of Contents
ToggleOutdoor lighting does more than help you find your front door after dark, it shapes how your home looks, feels, and functions after sunset. A well-lit exterior improves safety, highlights architectural details, and extends usable living space into the evening. Whether you’re aiming to deter intruders, light a walkway, or create ambiance for a patio dinner, the right fixtures in the right places make all the difference. This guide walks through fixture types, placement strategies, and installation basics so you can tackle outdoor lighting projects with confidence.
Key Takeaways
- Outdoor lighting serves three critical functions—safety, security, and aesthetics—reducing trip hazards, deterring intruders, and increasing curb appeal and property value.
- Outdoor lights come in specialized types: path lights for walkways, motion-sensor floodlights for security, well lights for accent features, and wall sconces for entry doors, each requiring different brightness levels and placement strategies.
- Low-voltage LED landscape lighting systems are cost-effective and DIY-friendly, operating on 12-volt transformers and requiring cable runs kept under 100 feet to minimize voltage drop.
- Proper outdoor lighting placement involves layering task, security, and accent fixtures while avoiding common mistakes like spacing lights too far apart, pointing floods at windows, and neglecting seasonal plant growth.
- Weatherproof fixtures rated at least IP65 should be used, and any line-voltage work or new circuits must comply with the 2020 NEC code and be GFCI-protected, potentially requiring a licensed electrician.
- Start planning your outdoor lighting layout by walking your property at dusk, identifying dark zones and architectural features, then sketching a site map with fixture locations and cable runs before installation begins.
Why Outdoor Lighting Matters for Your Home
Outdoor lighting serves three core functions: safety, security, and aesthetics. On the safety front, well-placed lights reduce trip hazards on steps, walkways, and driveways. Dark entryways and uneven paths are common causes of falls, especially in wet or icy conditions.
From a security standpoint, a lit perimeter discourages opportunistic intruders. Motion-activated fixtures near doors, garages, and side yards eliminate hiding spots and alert homeowners to movement. Studies consistently show that visible lighting is one of the most effective low-cost deterrents for break-ins.
Aesthetically, exterior lighting adds curb appeal and extends the hours you can enjoy outdoor spaces. Accent lighting on trees, columns, or garden beds creates depth and drama. String lights, sconces, and lanterns turn patios and decks into functional rooms after dark. Done right, outdoor lighting increases both property value and livability without requiring a full landscape overhaul.
Types of Outdoor Lights and Where to Use Them
Choosing the right fixture type depends on the job, path lighting, security, or accent work each call for different beam patterns, brightness levels, and mounting styles.
Path and Landscape Lighting
Path lights (also called bollard or stake lights) typically stand 12 to 18 inches tall and line walkways, driveways, or garden borders. They cast a soft downward glow that guides foot traffic without glare. Look for fixtures rated for at least 100 to 200 lumens per unit: spacing them 6 to 8 feet apart provides even coverage. Low-voltage LED options are popular because they’re energy-efficient and safe to install, most run on 12-volt transformers rather than direct line voltage.
Well lights (in-ground uplights) highlight trees, shrubs, or architectural features from below. Install them in areas with good drainage to prevent water pooling in the housing. Adjustable beam angles let you fine-tune coverage as plants grow.
Spotlights and floodlights mounted on stakes or walls work for larger landscape elements, think specimen trees or stone facades. Use narrow-beam spotlights (15 to 30 degrees) for targeted accents and wide-beam floods (90+ degrees) for broad wash coverage. Most landscape lighting operates on low-voltage systems, but always verify voltage requirements before purchasing.
Security and Motion-Sensor Lights
Motion-sensor floodlights are the workhorses of perimeter security. Mount them 8 to 10 feet above grade near entry points, garage doors, and back patios. Dual-head LED floods typically output 1,800 to 3,000 lumens, bright enough to illuminate a 40-foot radius. Adjustable sensitivity and timer settings prevent false triggers from small animals or wind-blown branches.
Many current models integrate with smart-home systems, allowing remote control and custom scheduling via smartphone apps. For off-grid locations, solar-powered motion lights are viable, though their brightness and detection range lag behind wired alternatives. If your municipality follows the 2020 NEC (National Electrical Code), any new outdoor receptacles and hardwired lighting must be GFCI-protected.
Dusk-to-dawn fixtures use photocells to turn on automatically at sunset. They’re ideal for entryway sconces, post lanterns, or any light you want running every night without manual switching. Expect annual energy costs around $10 to $15 per fixture for LED models rated at 10 to 15 watts.
Accent and Decorative Lighting
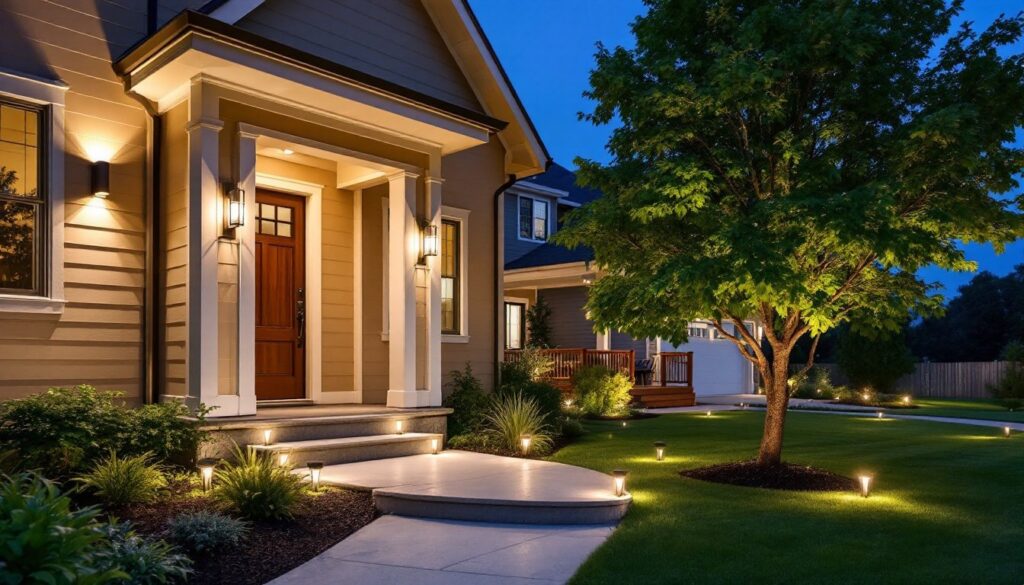
Wall sconces and lanterns frame entry doors and garage openings. Match fixture scale to door size, an 8-foot-tall door pairs well with sconces 18 to 24 inches high, mounted roughly 66 inches above the threshold. Dark Sky-compliant fixtures (those that direct light downward) reduce light pollution and glare for neighbors.
String lights and bistro bulbs create ambiance on decks, pergolas, and patios. Commercial-grade strands with rubber-coated sockets and shatter-resistant bulbs hold up better than indoor holiday lights. If you’re planning a spring refresh, swapping incandescent bulbs for LED Edison-style filaments cuts energy use by 80% without sacrificing warmth.
Step lights (recessed or surface-mount) fit into stair risers or retaining walls, providing subtle guidance without harsh overhead glare. Most code authorities require one light per step or every 3 feet of rise, whichever is more frequent, in new construction. Retrofit projects aren’t always held to the same standard, but adding step lights dramatically improves safety.
For all fixture types, check the IP rating (Ingress Protection). Outdoor lights should be at least IP65 (dust-tight and protected against water jets). Coastal or high-humidity zones benefit from IP66 or IP67 ratings.
How to Plan Your Outdoor Lighting Layout
Start by walking your property at dusk with a notepad. Identify dark zones, tripping hazards, and architectural features worth highlighting. Snap photos from the street and key sightlines, your layout should look balanced from multiple angles, not just the front door.
Divide your plan into layers: task lighting (paths, steps, entries), security lighting (motion zones, perimeter floods), and accent lighting (landscape, facade details). Layering prevents over-lighting any single area and gives you flexibility to turn off decorative fixtures when you just need functional illumination.
Sketch a rough site map showing fixture locations, cable runs (for low-voltage systems), and power sources. Group lights by circuit to avoid overloading a single transformer or breaker. A typical 60-watt low-voltage transformer can power six to eight 7-watt LED path lights: check the manufacturer’s load chart before finalizing quantities.
Common outdoor lighting mistakes include spacing fixtures too far apart (leaving dark gaps), pointing floods directly at windows (creating glare), and neglecting to plan for seasonal plant growth. Trees and shrubs change shape, aim lights at the trunk or base rather than relying on foliage for diffusion.
Consider smart LED systems if you want programmable schedules, color-changing accents, or integration with voice assistants. Many Wi-Fi-enabled fixtures install exactly like traditional models but add app-based control for scenes and timers.
For larger properties or complex layouts, a licensed landscape lighting designer can create a photometric plan showing light levels and coverage patterns. Expect to pay $300 to $800 for a design, which can save money by preventing fixture overkill and ensuring compliance with local dark-sky ordinances.
Installation Tips for DIY Outdoor Lighting Projects
Most homeowners can handle low-voltage landscape lighting installations without an electrician. Line-voltage work (120V) that involves new circuits, junction boxes, or permanent hardwiring typically requires a permit and should be left to a licensed professional unless you’re comfortable working inside your main panel.
Tools and materials:
- Low-voltage transformer (sized to your total wattage)
- Landscape wire (12-gauge or 14-gauge, direct-burial rated)
- Wire connectors (waterproof gel-filled or grease-filled)
- Fixtures (path lights, spotlights, etc.)
- Flat-head shovel or edger
- Wire strippers
- Voltage tester
- Safety glasses and work gloves
Step-by-step process:
- Mount the transformer near a GFCI-protected outdoor outlet, ideally under an eave or in a weather-resistant enclosure. Most transformers have a built-in timer and photocell: set the timer to match your desired on/off schedule.
- Lay out fixtures along your planned route before digging. Turn them on (using a temporary power source if possible) to verify spacing and aim. Adjust as needed.
- Trench the cable 6 to 8 inches deep using a flat shovel or edger. Keep runs under 100 feet from the transformer to minimize voltage drop: if you need longer runs, step up to 10-gauge wire or add a second transformer.
- Connect fixtures using the manufacturer’s connectors, most are quick-clip or piercing types that don’t require wire stripping. Leave a small service loop (6 to 8 inches of slack) at each fixture for future adjustments.
- Test voltage at the farthest fixture with a multimeter. You should read 10.8 to 12 volts. Anything below 10.5V indicates excessive voltage drop: shorten the run, use heavier wire, or reduce the fixture count.
- Bury the cable and backfill trenches, tamping soil lightly to avoid settling. Mark cable routes on your site map so you don’t dig into them during future projects.
For motion-sensor floodlights that replace existing porch lights, turn off power at the breaker and verify it’s dead with a non-contact voltage tester. Most fixtures mount to a standard octagonal junction box with two screws: the wiring is straightforward black-to-black, white-to-white, green-to-ground. Adjust the motion sensor’s range and duration dials after installation, start conservative and increase sensitivity if needed.
Safety notes:
- Always wear safety glasses when drilling or cutting.
- Use a GFCI-protected outlet for transformers and plug-in fixtures. GFCI protection is required by NEC Article 210.8 for all outdoor receptacles.
- Avoid burying standard extension cords, they’re not rated for direct burial and will degrade. Use only wire labeled “direct burial” or install conduit.
- If your project involves digging deeper than 12 inches or near property lines, call 811 (or your local utility locator service) at least two business days ahead to mark underground gas, electric, and water lines.
For fixtures that integrate with home automation, follow the manufacturer’s pairing instructions. Most connect via Wi-Fi or Zigbee/Z-Wave hubs, and setup typically takes 5 to 10 minutes per device. Platforms like smart home systems offer detailed walkthroughs for popular brands.
Regular lighting maintenance, cleaning lenses, checking connections, and trimming overgrown plants, keeps your system performing well. LED bulbs last 25,000 to 50,000 hours, but fixtures exposed to salt air or heavy moisture may need gasket or socket replacements every few years. Inspect wire connections annually for corrosion, especially in coastal or high-humidity climates.
If you’re coordinating outdoor lighting with broader landscape design or integrating it into a full exterior refresh, plan fixture locations before hardscaping or planting. It’s far easier to run cable before pavers go down than to retrofit later.


