Table of Contents
ToggleGood bathroom lighting isn’t a luxury, it’s the difference between applying eyeliner like a pro and looking like you fought with a marker. Whether someone’s shaving, applying makeup, or hunting for that errant contact lens, the right fixtures make every task easier and safer. But bathrooms present unique challenges: moisture, limited space, and electrical codes that don’t mess around. This guide walks through fixture types, placement strategies, selection criteria, and installation safety so homeowners can upgrade their bathroom lighting with confidence.
Key Takeaways
- Proper bathroom lighting fixtures are essential for safety and functionality, eliminating shadows that make grooming tasks difficult and reducing slip and fall risks.
- Vanity lights should be mounted on either side of the mirror at 60-65 inches from the floor, providing 75-100 watts or 1,100-1,600 lumens of light for even face illumination.
- All bathroom lighting fixtures must carry UL Damp or Wet Location ratings depending on proximity to water sources, with showers and tubs requiring sealed, wet-rated recessed cans.
- Choose LED bulbs with a Color Rendering Index (CRI) of 90 or higher and a color temperature of 3000K-4000K to ensure accurate color representation without harsh clinical lighting.
- Proper installation requires GFCI protection, verified power shutoff using a voltage tester, correct wire gauges matched to breaker sizes, and sealed recessed trim rings to prevent air and moisture leaks.
- Well-designed bathroom lighting combinations that layer vanity, ambient, and task lighting significantly increase home value and are among the most cost-effective upgrades homeowners can complete.
Why Bathroom Lighting Fixtures Matter More Than You Think
Most people underestimate how hard a bathroom works. It’s where the morning routine happens, where late-night emergencies get handled, and where homeowners perform precision tasks that require actual visibility.
Poor lighting creates real problems. Shadows cast by a single overhead fixture turn a mirror into a funhouse reflection, making grooming tasks unnecessarily difficult. Insufficient light levels increase the risk of slips, falls, and medication errors, especially for older adults.
Bathrooms demand fixtures rated for moisture. The National Electrical Code (NEC) requires specific fixture ratings based on proximity to water sources. A fixture installed directly above a tub or within shower zones must carry a UL Damp or Wet Location rating. Ignoring this isn’t just sloppy, it’s a fire and shock hazard.
Beyond safety, lighting affects how colors appear. Makeup applied under warm-toned bulbs looks different in daylight. Paint choices, tile colors, and even skin tone read differently depending on color temperature, measured in Kelvin. For bathrooms, 3000K to 4000K (neutral to cool white) provides the most accurate color rendering without the harshness of clinical lighting.
Finally, bathroom lighting impacts home value. Real estate agents consistently note that updated lighting, especially in master baths, ranks high on buyer wish lists. It’s one of the most cost-effective upgrades a homeowner can tackle.
Types of Bathroom Lighting Fixtures and Where to Use Them
Effective bathroom lighting relies on layering: combining multiple fixture types to eliminate shadows and provide flexible light levels. Each type serves a specific purpose.
Vanity Lighting: The Foundation of Bathroom Illumination
Vanity lights handle the most critical task: lighting faces evenly for grooming. Placement matters more than wattage.
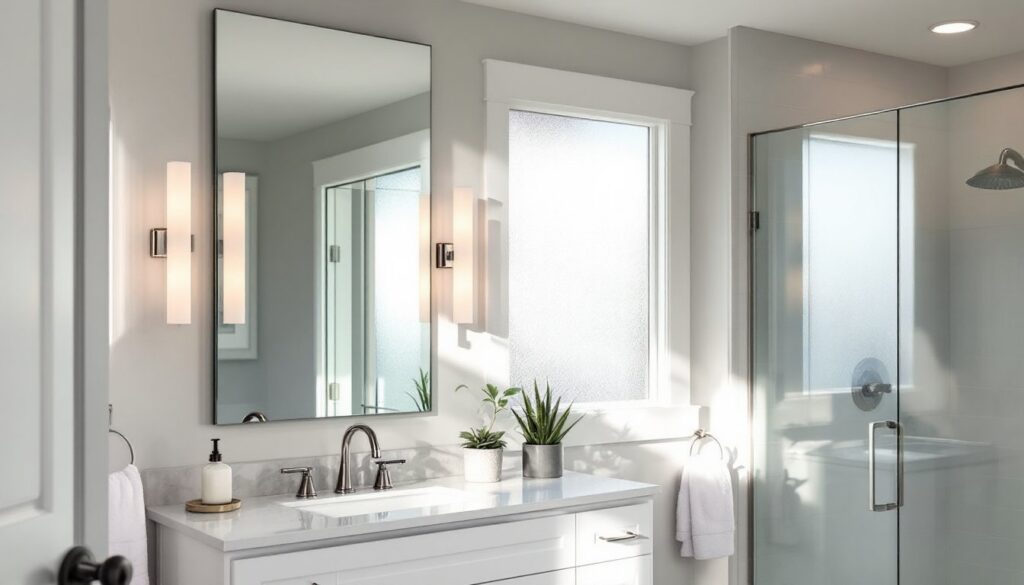
The gold standard is vertical fixtures mounted on either side of the mirror, positioned at roughly 60 to 65 inches from the floor (measured to the fixture center). This arrangement casts light across the face rather than down from above, eliminating the shadows that make shaving and makeup application frustrating. Each fixture should house bulbs totaling 75 to 100 watts of incandescent equivalent (or 1,100 to 1,600 lumens for LED).
When wall space doesn’t allow side mounting, a horizontal bar or multi-light fixture above the mirror works as a fallback. Mount it as close to the mirror as possible, ideally no more than 3 inches above the top edge. The fixture should span at least 75% of the mirror width to minimize side shadows.
Sconces offer flexibility. Choose fixtures with frosted or opal glass shades to diffuse light evenly. Clear glass looks sharp but creates harsh glare and hotspots. Globe-style sconces work well for side mounting, while linear bath bars suit horizontal installations.
For double-sink vanities, treat each sink as its own zone. Two separate fixtures provide better light distribution than one long bar trying to cover 72 inches of counter space. Modern recessed lighting housing can supplement vanity lights when positioned carefully to avoid casting shadows.
Overhead and Ambient Lighting Options
Ceiling-mounted fixtures and recessed cans provide ambient light, the general illumination that fills the room and ensures nobody’s tripping over the bath mat.
Flush-mount and semi-flush ceiling fixtures work well in bathrooms with standard 8-foot ceilings. Look for fixtures with enclosed glass to protect bulbs from moisture. A single 75-watt equivalent (1,100 lumens) fixture typically lights a 5×8-foot bathroom adequately, though larger spaces need more output or additional fixtures.
Recessed lighting offers a clean look but requires careful placement. A common mistake is centering a can directly above the vanity, which casts the user’s face into shadow. Instead, position recessed fixtures to light between the vanity and the shower or tub. For a 100-square-foot bathroom, four 4-inch or 5-inch LED recessed cans rated at 650-750 lumens each provide even coverage.
Use IC-rated (Insulation Contact) recessed housings if insulation sits above the bathroom ceiling. Non-IC cans require a 3-inch clearance from insulation, which isn’t always practical in finished homes. Always choose fixtures with airtight housings to prevent moisture migration into attic spaces.
Shower and tub lighting requires wet-location-rated fixtures. Recessed cans designed for showers include sealed glass lenses and silicone gaskets. Position them to light the tub or shower floor, not directly overhead where they’ll shine in someone’s eyes. According to Houzz, homeowners increasingly favor waterproof LED strips along shower niches for functional accent lighting.
For powder rooms or small half-baths, a single well-placed fixture often suffices. But full bathrooms benefit from combining ambient and task lighting on separate switches or dimmers.
How to Choose the Right Bathroom Lighting Fixtures for Your Space
Selection starts with measuring. Grab a tape measure before browsing fixtures online.
Size the fixture to the space. For vanity lighting, the general rule is that the combined width of fixtures should equal 50-75% of the mirror width. A 36-inch mirror pairs well with a 24 to 30-inch bath bar or two sconces spaced 28 to 36 inches apart (measured center-to-center).
Ceiling fixtures shouldn’t overwhelm the room. For flush-mounts, a fixture diameter in inches should roughly equal the room’s length plus width in feet, divided by 2.5. A 7×9-foot bathroom suggests a 6 to 7-inch-diameter fixture (though this is a guideline, not gospel).
Match bulb type to usage. LED bulbs dominate the market for good reason: they produce minimal heat, last 15,000-50,000 hours, and use 75-80% less energy than incandescent bulbs. For bathrooms, choose bulbs labeled “dimmable” if installing a dimmer switch, not all LEDs dim smoothly.
Color Rendering Index (CRI) matters. This measures how accurately a light source shows colors compared to natural daylight. Bathrooms need bulbs with a CRI of 90 or higher for true color representation. Cheap bulbs often sit around 80 CRI, which makes everything look slightly washed out.
Check fixture ratings. The UL listing indicates basic safety compliance, but bathrooms require more. Look for these markings:
- Damp-rated: Suitable for bathrooms with typical humidity but not direct water contact (most general bathroom areas)
- Wet-rated: Required for fixtures inside showers, above tubs, or in steam shower enclosures
- IP ratings: The international standard uses a two-digit code. IP44 (splash-proof) works for general bathroom use: IP65 or higher (water-jet proof) suits shower installations.
Style should follow function. A gorgeous fixture that doesn’t provide adequate light is decorative art, not a lighting solution. That said, fixtures set the bathroom’s aesthetic tone. Brushed nickel and chrome remain popular for contemporary and transitional styles, while oil-rubbed bronze and matte black suit farmhouse and industrial looks. Consider how interior lighting choices throughout the home create visual flow.
Factor in ventilation. Bathrooms need exhaust fans, and combination fan-light units tempt budget-conscious homeowners. They work for powder rooms but typically compromise on both light output and fan performance. Separate dedicated fixtures perform better. If choosing a combo unit, verify it meets Home Ventilation Institute (HVI) standards for CFM (cubic feet per minute) airflow, at least 1 CFM per square foot of bathroom space.
Installation Tips and Safety Considerations
Electrical work in bathrooms isn’t casual DIY territory. If the project involves running new circuits, moving junction boxes, or working inside walls, most jurisdictions require permits and licensed electricians. Swapping an existing fixture for a similar one (same box, same wiring) usually qualifies as homeowner-permissible work, but check local codes.
GFCI protection is mandatory. The NEC requires Ground Fault Circuit Interrupter protection for all bathroom receptacles and, in some cases, lighting circuits within certain distances of water sources. If replacing a fixture reveals old, ungrounded wiring (just two wires: black and white, no ground), stop. This requires professional assessment.
Turn off power at the breaker, not just the switch. Wall switches can be miswired. Use a non-contact voltage tester to verify power is truly off before touching any wires. These tools cost under $20 and prevent potentially lethal mistakes.
Follow fixture weight limits. Standard ceiling boxes support 50 pounds. Heavier chandeliers or large fixtures require fan-rated or adjustable bar hangers spanning between joists. If a new fixture weighs significantly more than the old one, inspect the mounting box before proceeding.
Wire nuts and connections must stay inside the box. Never leave splices exposed or stuffed behind drywall. Use appropriately sized wire nuts (typically orange for two 14-gauge wires, yellow for two 12-gauge), and wrap the base with electrical tape for extra security in damp environments.
Match wire gauges and breaker sizes. A 15-amp circuit uses 14-gauge wire: a 20-amp circuit requires 12-gauge. Don’t mix them. Connecting 14-gauge wire to a 20-amp breaker creates a fire hazard.
Caulk recessed can trim rings. Even IC-rated recessed fixtures can leak conditioned air if not sealed properly. A bead of clear silicone or acrylic caulk around the trim ring (where it meets the ceiling) stops drafts and moisture migration. This small step pays off in energy efficiency, especially with multiple cans.
Test before finishing. Once the fixture is wired but before securing trim or shades, restore power and test operation. Check that dimmers function smoothly across the full range and that bulbs seat correctly without flickering.
PPE for electrical work: At minimum, wear safety glasses and use insulated tools. Work on a dry surface and remove metal jewelry. If cutting into walls or ceilings, add a dust mask and have a headlamp or work light ready, ironically, installing lighting often happens in the dark.
For those planning broader upgrades, understanding proper lighting maintenance extends fixture lifespan and performance. Resources from The Spruce cover ongoing care for various fixture types, and Remodelista’s bathroom lighting guide offers additional installation strategies for achieving flattering results.
Conclusion
Getting bathroom lighting right transforms daily routines from frustrating to functional. The combination of properly placed vanity lights, adequate ambient fixtures, and moisture-rated components creates a space that’s safe, usable, and visually appealing. Whether someone’s tackling a full remodel or simply replacing dated fixtures, attention to placement, ratings, and installation safety makes all the difference. A well-lit bathroom isn’t just brighter, it works better.


