Table of Contents
ToggleLow voltage landscape lighting adds curb appeal and security, but it’s frustrating when fixtures start flickering, dimming, or going dark altogether. The good news? Most low voltage lighting failures are straightforward to diagnose and fix without calling an electrician. These systems run on 12 or 24 volts, safe to work with and forgiving of minor mistakes. Whether you’re dealing with a single dead bulb or an entire zone that won’t light, this guide walks through the troubleshooting process step-by-step, covering everything from transformer checks to wire repairs and fixture swaps.
Key Takeaways
- Most low voltage landscape lighting problems—including dead bulbs, corroded connections, voltage drop, and transformer failures—can be diagnosed and fixed without an electrician using a digital multimeter and basic tools.
- Always start troubleshooting at the transformer and work outward toward fixtures; test output voltage (should read 12V–14V or 24V) and verify total system wattage doesn’t exceed the transformer’s rated capacity to avoid overload shutdowns.
- Corroded wire connections are a leading cause of dim or flickering lights; inspect buried splices every 2–3 years, clean deposits with a wire brush, and apply dielectric grease to seal out moisture and prevent future corrosion.
- Use 12 AWG or 14 AWG copper wire for landscape lighting runs over 50 feet to minimize voltage drop; if fixtures dimly illuminate at the end of a run, upgrading wire gauge or running a dedicated home run often resolves the issue.
- Replace halogen bulbs with LED retrofits to reduce load on the transformer, eliminate heat-related socket degradation, and extend maintenance intervals thanks to LEDs’ 25,000+ hour lifespan versus halogen’s 2,000–4,000 hours.
- Keep a simple map of your transformer location, wire runs, fixture positions, and wire gauges on file; preventive annual inspections and connection protection every 2–3 years significantly reduce emergency repairs and downtime.
Common Low Voltage Landscape Lighting Problems and Causes
Understanding what typically goes wrong helps narrow down the repair faster. Here are the usual suspects:
Dead or dim bulbs. LED and halogen bulbs both have finite lifespans. LEDs can last 25,000+ hours, but cheaper units fail earlier. Halogen bulbs burn out after 2,000-4,000 hours and often blow during power surges.
Corroded wire connections. Landscape lighting wire is buried or exposed to moisture. Wire nuts, crimp connectors, and piercing-style connectors all corrode over time, especially if they weren’t filled with dielectric grease at install. Corrosion increases resistance, causing voltage drop and dim lights at the end of a run.
Voltage drop along the wire run. Low voltage systems are sensitive to distance. If fixtures are spaced too far from the transformer or the wire gauge is too small (common with 18 AWG runs over 50 feet), voltage drops below the 10.8–12 volt range most fixtures need. Lights farthest from the transformer dim or fail first.
Transformer failure or tripped breaker. Transformers step down 120V household current to 12V or 24V. Internal fuses, photo sensors, and timers can fail. Some transformers trip their internal breaker if total wattage exceeds capacity, adding fixtures without upgrading the transformer is a frequent mistake.
Physical damage to fixtures or wiring. Lawn mowers, edgers, and shovels nick or sever buried wire. Plastic fixture stakes crack in freeze-thaw cycles. Water intrusion into sockets causes shorts or corrosion.
Timer or photocell malfunction. If lights won’t turn on at dusk, the photocell may be dirty, misaligned, or failed. Mechanical timers can stick: digital ones lose programming after power outages.
Tools and Materials You’ll Need for Repairs
Most low voltage lighting repairs require basic tools and a few specialty items. Gather these before starting:
Tools:
- Digital multimeter (essential for voltage and continuity testing)
- Wire strippers
- Screwdrivers (flathead and Phillips)
- Pliers and wire cutters
- Shovel or garden trowel (for exposing buried wire)
- Utility knife
- Flashlight or headlamp (you’ll be working at dusk or in dim areas)
Materials:
- Replacement bulbs (match voltage and wattage to your fixtures, typically 12V, 4W to 20W)
- Dielectric grease (prevents corrosion in connectors)
- Waterproof wire connectors or heat-shrink butt splices
- Electrical tape
- Replacement landscape wire (12 AWG or 14 AWG copper for runs over 50 feet: 16 or 18 AWG for shorter runs)
- Replacement fixtures (if housings are cracked or corroded beyond repair)
- Spare fuses for the transformer (check transformer spec plate for amp rating)
Safety note: Even though low voltage systems are safer than 120V, always disconnect the transformer from household power before working on wiring or making connections. Wear safety glasses when cutting or stripping wire, and use gloves if handling fixtures with sharp edges or corrosion.
Step-by-Step Troubleshooting Process
Troubleshooting follows a logical sequence: start at the power source and work outward toward the fixtures. This eliminates guesswork and prevents unnecessary part swaps.
Testing the Transformer and Power Supply
The transformer is the heart of the system. If it’s not outputting the correct voltage, nothing downstream will work properly.
-
Check household power. Verify the outlet or circuit supplying the transformer has power. Plug in a different device or use a non-contact voltage tester. Reset any tripped breakers.
-
Inspect the transformer. Look for a tripped internal breaker, blown fuse, or burnt smell. Some units have a reset button on the case. Check the photo sensor (if equipped), cover it with your hand or tape to simulate darkness and see if the system activates.
-
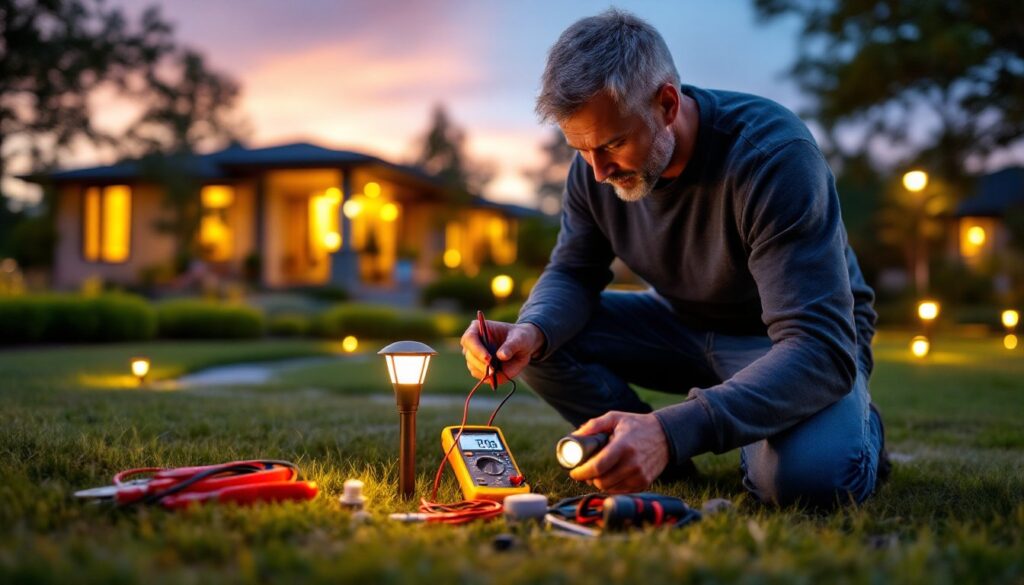
Test output voltage. Set your multimeter to DC voltage. Touch the red probe to the positive terminal and the black probe to the negative (or common) terminal on the transformer’s low-voltage output. You should read 12V to 14V (or 24V for 24V systems). If you get zero or significantly low voltage, the transformer is likely failed and needs replacement.
-
Check total load. Add up the wattage of all connected bulbs. If the total exceeds the transformer’s rated capacity (e.g., 120W, 200W, 300W), the unit may be overloaded and shutting down. Either upgrade the transformer or reduce the number of fixtures.
Inspecting and Repairing Wiring Connections
Once you’ve confirmed the transformer is outputting correct voltage, trace the wiring to find breaks or bad connections.
-
Test voltage at the first fixture. Disconnect the bulb and test voltage at the socket or wire leads. It should be close to transformer output (within 1-2 volts). If voltage is correct here but lights still don’t work, the problem is likely in the fixtures or bulbs, not the wiring.
-
Test voltage at distant fixtures. Move down the line and test each fixture. A gradual voltage drop is normal, but readings below 10.8V will cause dim or non-functional lights. If voltage drops sharply between two fixtures, suspect a bad connection or damaged wire in that span.
-
Inspect all wire connections. Dig up or expose connectors along the run. Look for corrosion (white or green deposits), loose wires, or moisture inside connectors. Clean corroded connections with a wire brush or replace them. Apply dielectric grease inside new connectors to seal out moisture. Avoid cheap piercing connectors, they’re prone to failure. Use waterproof wire nuts or heat-shrink butt connectors instead.
-
Check for wire damage. Look for nicks, cuts, or crushed sections. If you find a break, cut out the damaged section and splice in a new piece of wire using waterproof connectors. Bury splices at least 6 inches deep to protect from garden tools. The National Electrical Code (NEC) Article 411 covers low voltage lighting: while most jurisdictions don’t require permits for low voltage work, following code is good practice.
-
Test continuity. If a section of wire is suspect, disconnect it from the transformer and use the multimeter’s continuity or resistance mode. Touch probes to each end of the wire. A good wire shows near-zero resistance: an open (broken) wire shows infinite resistance.
Many outdoor lighting repairs involve resolving hidden connection issues that develop over time in buried wire runs.
Replacing Faulty Bulbs and Fixtures
If voltage is good but lights still don’t work, the bulb or fixture itself is the problem.
Replacing bulbs:
- Let the bulb cool if it was recently on (halogen bulbs get extremely hot).
- Twist or pull the bulb from the socket. Some fixtures use bi-pin, wedge, or bayonet-style bases, note the type before buying replacements.
- Check the socket for corrosion or moisture. Dry it out and apply a small amount of dielectric grease to the contacts.
- Install the new bulb. Match the voltage (12V or 24V) and don’t exceed the fixture’s maximum wattage rating. LED retrofits are a smart upgrade, they draw less power, run cooler, and last much longer than halogen.
Replacing fixtures:
If the housing is cracked, the lens is shattered, or the socket is corroded beyond cleaning, replace the entire fixture.
- Disconnect the fixture wires from the main cable. Note wire polarity if marked (though low voltage systems aren’t strict about polarity for most bulbs).
- Pull the old stake or mount from the ground or wall.
- Connect the new fixture using waterproof connectors and dielectric grease. Match wire gauge, don’t use a 20 AWG pigtail to splice into 12 AWG main cable without a proper connector rated for dissimilar gauges.
- Test the new fixture before burying connections or backfilling soil.
Homeowners committed to lighting maintenance often keep spare bulbs and a couple of backup fixtures on hand for quick swaps during the season.
Preventive Maintenance Tips to Extend System Life
A little upkeep goes a long way in preventing future failures.
Annual inspection. Once a year, walk the system at night and note any dim, flickering, or dead lights. Test transformer output voltage and check total system wattage. Clean the photo sensor with a damp cloth, dust and spider webs can fool it into thinking it’s still daylight.
Protect connections. Every two to three years, dig up and inspect buried splices. Reapply dielectric grease if connectors look dry. Replace any corroded connectors before they fail completely.
Upgrade wire gauge on long runs. If you’ve added fixtures over time and notice dimming, consider running a dedicated 12 AWG or 10 AWG home run to distant zones. Voltage drop tables (widely available from lighting design resources) help calculate the right gauge for your total load and distance.
Switch to LED bulbs. LEDs reduce load on the transformer, generate less heat (which degrades sockets), and last 10x longer than halogen. They cost more upfront but pay off in reduced maintenance.
Trim vegetation. Overgrown shrubs and grass can trap moisture around fixtures and bury wire connections. Keep plantings trimmed back and fixtures clear of mulch or soil buildup.
Seasonal shutdown (optional). In regions with harsh winters, some homeowners disconnect and store fixtures to prevent freeze damage. If you leave the system in place, ensure wire connections are buried below the frost line (varies by region, typically 12-36 inches).
Keep records. Sketch a simple map showing transformer location, wire runs, and fixture positions. Note wire gauges and transformer capacity. This makes future troubleshooting and expansion much easier. Many experienced DIYers who tackle home electrical projects recommend keeping a dedicated notebook for all outdoor wiring layouts and maintenance logs.
By following these steps, most landscape lighting issues can be resolved in an afternoon with minimal cost and no need for a professional service call.


