Table of Contents
ToggleBathroom lighting isn’t just about flipping a switch, it’s about creating a space that works for everything from precision grooming to a relaxing soak. The ceiling is prime real estate for delivering the right kind of light, whether you’re renovating a cramped powder room or upgrading a spacious primary bath. Get it wrong, and you’ll face shadows during morning routines or a harsh, clinical glare. Get it right, and you’ll add both function and style to one of the most-used rooms in the house. This guide walks through the best ceiling lighting options for bathrooms in 2026, from sleek recessed cans to bold statement fixtures.
Key Takeaways
- Ceiling bathroom lighting ideas should prioritize damp or wet-rated fixtures to meet electrical codes and prevent hazards, especially near showers and tubs.
- Recessed lighting provides a clean, modern look with even shadow-reducing coverage—space cans roughly half the ceiling height apart for optimal bathroom illumination.
- Bathroom ceiling fixtures need 70–80 lumens per square foot; a 50-square-foot bathroom requires 3500–4000 lumens total across all fixtures.
- Warm white (2700K–3000K) and neutral white (3500K–4000K) color temperatures are most flattering for grooming tasks and skin tones, while cool white should be avoided.
- LED strip lighting and backlit ceilings create spa-like ambient glow and are energy-efficient, but require more complex installation than standard flush-mount or semi-flush fixtures.
- Pair any ceiling lighting with dimmers and ensure CRI of 90+ for accurate color rendering during makeup and shaving routines.
Why Ceiling Lighting Matters in Bathroom Design
Bathrooms demand more from lighting than most rooms. Unlike a bedroom or living room where ambient light sets the mood, bathrooms require task lighting for shaving, makeup application, and general grooming. Ceiling fixtures provide overhead illumination that fills the entire space, reducing harsh shadows and supplementing vanity lights.
Code and safety also come into play. Most jurisdictions require bathroom lighting to be rated for damp or wet locations, especially near showers and tubs. The National Electrical Code (NEC) mandates specific clearances and fixture ratings based on proximity to water sources. Ignoring these can lead to failed inspections or worse, electrical hazards.
Proper ceiling lighting also affects resale value. A well-lit bathroom feels larger, cleaner, and more modern. Buyers notice dark corners and outdated fixtures. Investing in quality ceiling lights delivers both immediate comfort and long-term return.
Recessed Lighting for a Clean, Modern Look
Recessed cans (also called “pot lights” or “downlights”) sit flush with the ceiling, making them ideal for bathrooms with low ceilings or where a minimalist aesthetic is the goal. They provide even, shadow-reducing light without protruding into the room.
Installation basics: Standard recessed housing fits between ceiling joists spaced 16 inches on center. If you’re retrofitting an existing ceiling, remodel-style housings with clips work without attic access. New construction housings nail directly to joists before drywall goes up. Either way, you’ll need recessed lighting housing rated for damp or wet locations, look for the UL “Wet” or “Damp” label.
Spacing matters. A common rule of thumb: divide the ceiling height by two to get spacing in feet. For an 8-foot ceiling, place cans roughly 4 feet apart. In a 5×8-foot bathroom, four cans in a grid pattern deliver even coverage. Avoid placing a single recessed light directly over the tub, it creates unflattering shadows on faces.
Trim options include baffle (reduces glare), reflector (maximizes brightness), and eyeball (directional). For bathrooms, baffle or shower-rated trims work best. Pair recessed lights with a dimmer to adjust brightness for different times of day.
Pro tip: LED retrofit kits make upgrading old incandescent cans a 10-minute job. They screw into the existing socket and clip into the trim ring, no rewiring needed.
Flush Mount and Semi-Flush Mount Fixtures
Flush mounts sit tight against the ceiling, while semi-flush mounts drop down a few inches on a short stem. Both are workhorses for bathrooms where ceiling height or moisture exposure limits other options.
Flush mounts work well in powder rooms, hallway baths, or anywhere clearance is tight. A 10- to 14-inch diameter fixture covers a small to mid-sized bathroom. Look for frosted or opal glass diffusers to soften the light, clear glass can create glare off mirrors and tile.
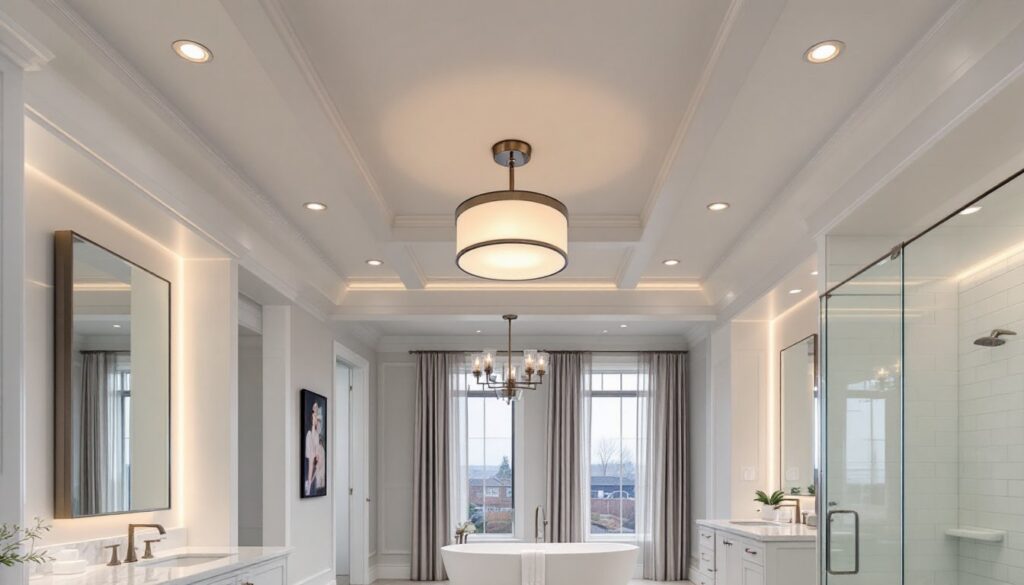
Semi-flush mounts add a bit more design interest without sacrificing headroom. They typically hang 4 to 8 inches below the ceiling, which helps spread light more evenly than a flush mount. This style fits bathrooms with 8- to 9-foot ceilings where you want a step up from basic builder-grade fixtures.
Material matters. Bathrooms are humid. Choose fixtures with rust-resistant finishes like brushed nickel, chrome, or powder-coated steel. Avoid bare metal that will corrode or fabric shades that trap moisture.
Safety note: Both styles need to be rated for damp locations at minimum. If the fixture will be within 3 feet of a shower or tub, use a wet-rated fixture. Check the UL label before purchasing. Designs inspired by interior lighting trends can enhance bathroom aesthetics without sacrificing safety.
Installation is straightforward if you’re replacing an existing fixture. Turn off power at the breaker, disconnect the old fixture, match the wires (black to black, white to white, ground to ground), and mount the new fixture to the ceiling box. If the box is loose or plastic, upgrade to a metal pancake box rated for the fixture’s weight.
Statement Chandeliers and Pendant Lights
Who says bathrooms can’t have personality? Chandeliers and pendants bring drama and style, especially in larger primary baths or powder rooms with high ceilings.
Chandeliers work best over freestanding tubs or in the center of spacious bathrooms with at least 9-foot ceilings. A 20- to 24-inch diameter fixture suits a standard tub area. Hang the bottom of the chandelier at least 7 feet above the floor to avoid head strikes, higher if you’re tall.
Pendant lights offer more flexibility. A single pendant over a vanity or a pair flanking a mirror adds focused task lighting with flair. Mini-pendants with glass or metal shades are popular for modern and industrial styles. Keep the bottom of the shade 30 to 36 inches above the countertop for optimal task lighting without glare.
Moisture is the enemy. Not all chandeliers tolerate steam. If you’re hanging a fixture near a shower, it must be wet-rated. Even in a well-ventilated bathroom, choose fixtures with sealed sockets and corrosion-resistant finishes. Crystal chandeliers can work, but opt for glass or acrylic “crystals” over real lead crystal, which can tarnish in humidity.
Wiring: If there’s no existing ceiling box where you want the fixture, you’ll need to run new cable from a power source. This often means cutting into the ceiling and potentially the wall. If you’re not comfortable with electrical work, hire a licensed electrician. Most jurisdictions require a permit for new circuits or relocating outlets.
Style tip: A chandelier or pendant is a focal point. Keep other bathroom lighting fixtures understated so the statement piece doesn’t compete.
LED Strip Lighting and Backlit Ceilings
LED strip lighting isn’t just for under-cabinet accents, it’s become a go-to for creating ambient glow in modern bathrooms. Backlit ceilings, cove lighting, and recessed niches all rely on flexible LED strips.
Backlit ceilings (sometimes called “floating” or “tray” ceilings) use strips mounted on top of a recessed ledge or behind a perimeter soffit. The LEDs shine upward, bouncing light off the ceiling to create a soft, indirect glow. This setup requires framing a drop-down border around the ceiling perimeter, usually a 2×4 or 2×6 framework covered with drywall. Leave a 3- to 4-inch gap between the ledge and ceiling for the light to escape.
Installation: Run low-voltage (12V or 24V) LED strips along the ledge, connecting them to a transformer hidden in the ceiling or a nearby closet. Most strips come with adhesive backing, but add aluminum channel for a cleaner look and better heat dissipation. Use IP65-rated strips for damp locations.
Color temperature matters here. Cool white (5000K–6500K) feels clinical: warm white (2700K–3000K) is more inviting. Tunable or RGB strips let you adjust color and brightness via a remote or smartphone app, though they cost more and add complexity.
Pros and cons: LED strips are energy-efficient and long-lasting (up to 50,000 hours). They create a spa-like ambiance that’s hard to achieve with standard fixtures. The downside? Installation is more involved than swapping a fixture, and troubleshooting a failed section means accessing the ceiling. For bathroom projects, proper lighting maintenance extends the life of LED systems.
Tool note: You’ll need wire strippers, a soldering iron (or solder-free connectors), and potentially a drill for routing wires. If you’re building a new ceiling soffit, add a miter saw for cutting trim and a stud finder to locate joists.
Choosing the Right Brightness and Color Temperature
Lumens, not watts, measure brightness. A 100-watt incandescent bulb puts out about 1600 lumens: an LED can deliver the same light with just 15–20 watts.
How much light do you need? Bathrooms benefit from 70 to 80 lumens per square foot. A 50-square-foot bathroom needs roughly 3500 to 4000 lumens total. Split that across ceiling fixtures and vanity lights. If you’re installing four recessed cans, aim for 800 to 1000 lumens each (equivalent to a 60W incandescent).
Color temperature affects mood and function. Measured in Kelvin (K), it ranges from warm (yellowish) to cool (bluish). Here’s what works:
- 2700K–3000K (warm white): Relaxing, flattering for skin tones. Good for ambient ceiling fixtures.
- 3500K–4000K (neutral white): Balanced, accurate color rendering. Ideal for task lighting at vanities.
- 5000K–6500K (daylight/cool white): Crisp, energizing, but can feel harsh. Use sparingly or avoid in bathrooms.
For the most flattering results, experts recommend diffuse ceiling fixtures paired with warm or neutral white LEDs. Avoid mixing color temperatures in the same room, it creates visual dissonance.
CRI (Color Rendering Index) measures how accurately a light source shows colors. A CRI of 90 or higher is best for bathrooms where makeup and grooming require true-to-life color. Most quality LEDs now hit this mark.
Dimming: Not all LEDs are dimmable. Check the bulb or fixture specs, and pair dimmable LEDs with a compatible dimmer switch. Old incandescent dimmers often cause flickering or buzzing with LEDs. Upgrade to an LED-rated dimmer for smooth performance.
Safety reminder: Always wear safety glasses when working overhead, and use a non-contact voltage tester to confirm power is off before touching wires.
Conclusion
Ceiling lighting transforms a bathroom from functional to exceptional. Whether you’re retrofitting recessed cans, upgrading to a statement chandelier, or experimenting with LED strip accents, the right fixture improves safety, usability, and style. Prioritize damp- or wet-rated fixtures, aim for adequate lumens with flattering color temperature, and don’t skip the dimmer. With these options, any bathroom, big or small, can shine.


